
You will need:

- Modelling fondant (or alternative)
- Small, medium and large calyx cutters
- Red food colour paste (not required if you have red modelling paste)
- Green food colour paste (not required if you have green modelling paste)
- Gold or silver food colour paste, you can use white if you cant get gold or silver
- Rolling pin
- Ball tool with large ball
- Forming cup
- Cornflour for rolling out
- Small star shape cutter or small daisy cutter
- Water or edible glue and
- a brush
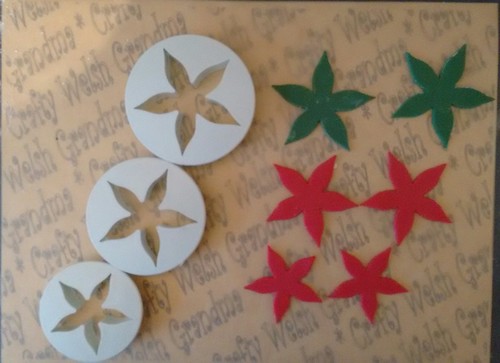
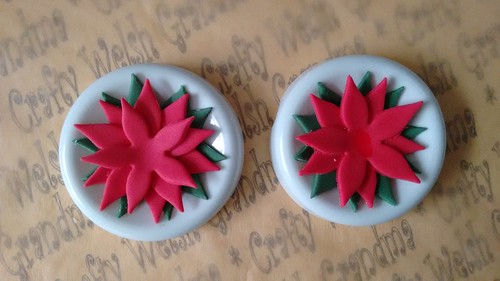
Step 1: Roll out fondant and cut
- Roll out green fondant and cut two using largest cutter
- Roll out red fondant and cute two medium and two small
- Always cover your fondant to stop it hardening
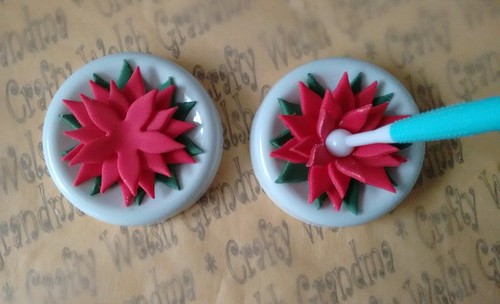
- Add one green shape to the forming cup.
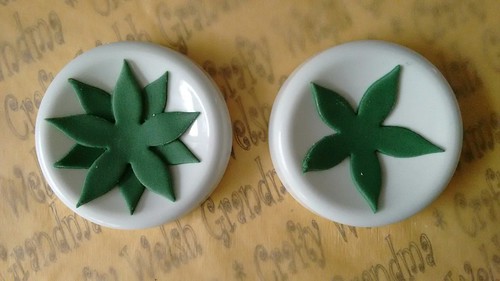
- Next, add a dab of water or edible glue to the centre, then add the second green shape with its points in the space left by the bottom layer.
- Using the same process as before, add the two medium sized shapes on top of the green - remembering each time to rotate the top shape slightly so it fills the gap between petals of the layer below.
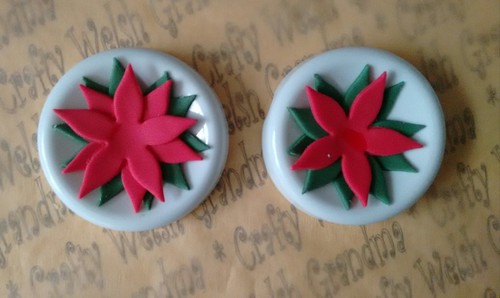
- Again, the same process with the smallest red shapes
Step 3: Add a small star or daisy shape
- Cut out your white star, or colour your fondant with the gold and cut out.
- Before you add it to your flower, with your large ball tool, gently press all the layers together. A dab of water or glue, then add the star
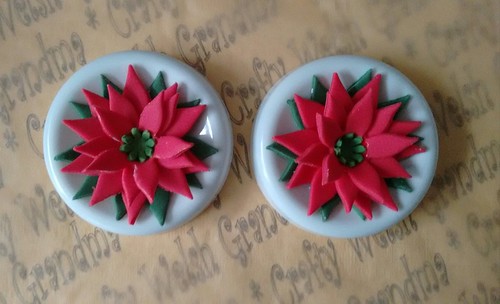
- Last but not least, use a small amount of modelling paste, roll into a small ball, add a drop of water or glue to centre then drop the small balls into centre of your flower.
- Alternatively, you can add a shop bought edible decorative ball

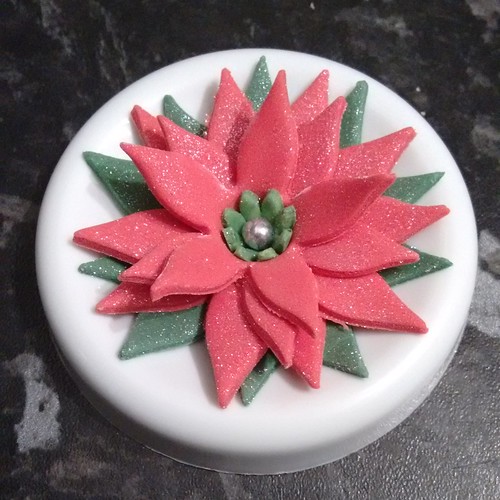
Step 4: Allow to dry
A featured post on Instructables
Click image above


No comments:
Post a Comment