
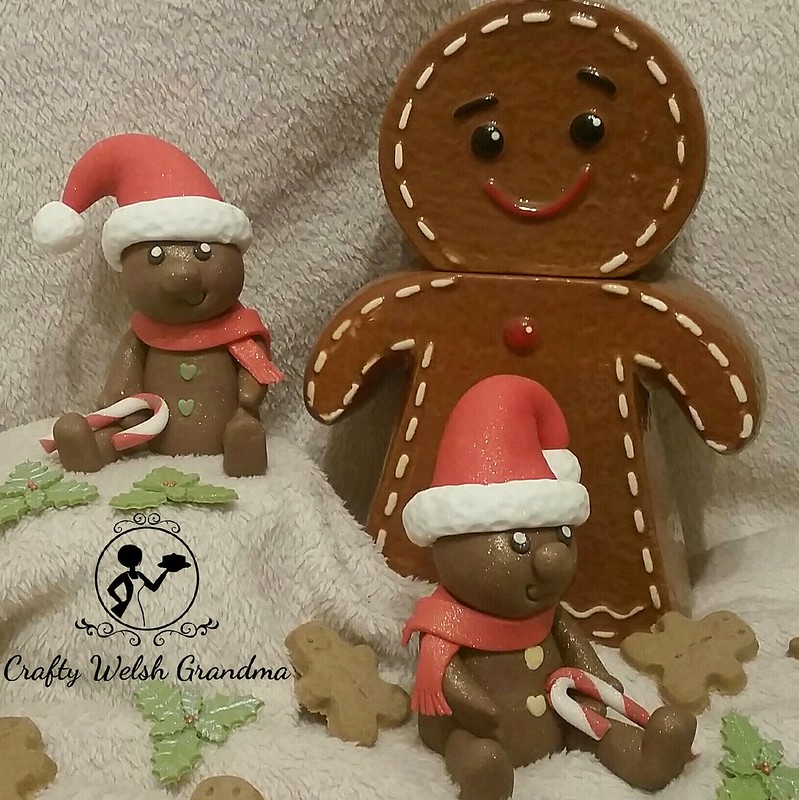
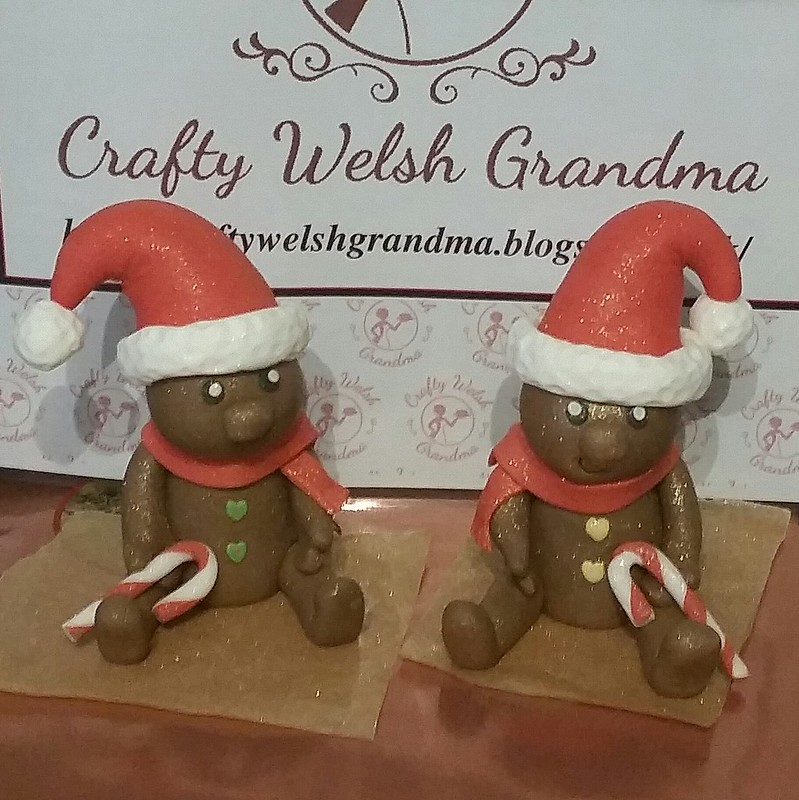
An absolutely cute gingerbread person cake topper made from fondant. I gained my inspiration from elsewhere, but this is my effort and I want to share it with you.
Check out my other festive fondant projects, new and from previous years, here.
Before I continue, I must give credit to Krazy Kool Cakes, they're on YouTube, along with the kawaii cupcakes toppers I shared recently that I also made.
I used:
- Renshaw's fondant in the following colours:
- Chocolate flavoured / Brown
- White
- Red
- Black
- A little of another chosen colour for buttons
- A small or medium ball tool
- A blade tool
- A scallop tool
- Small rolling pin
- Edible glue / water
- Small amounts of red and white modelling past if making a candy cane
If, like mine, the chocolate fondant you have it too dark, mix it with white until you reach the shade you like. Once you have the shade you like:
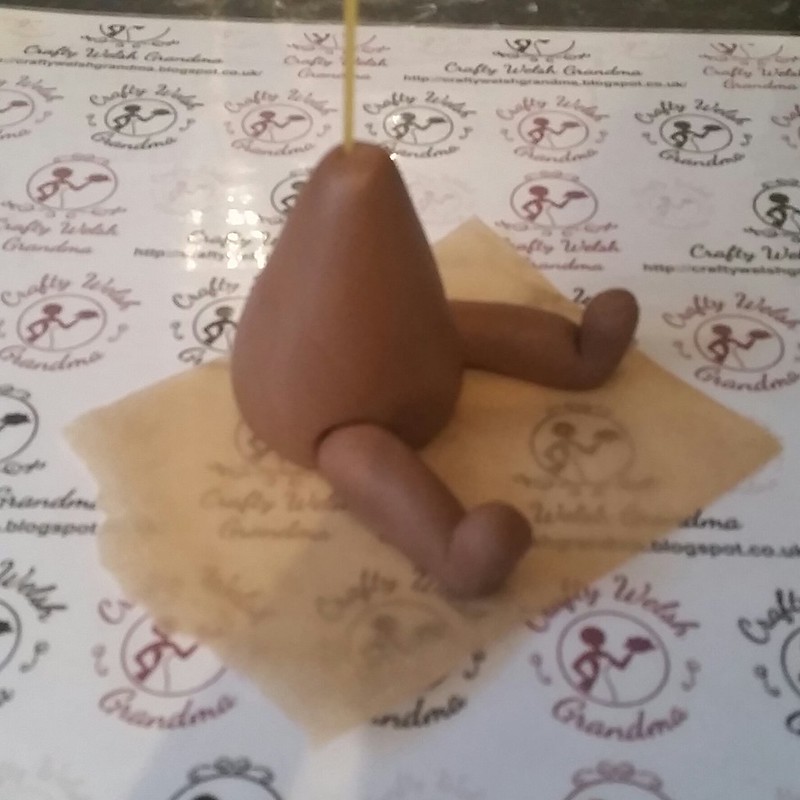
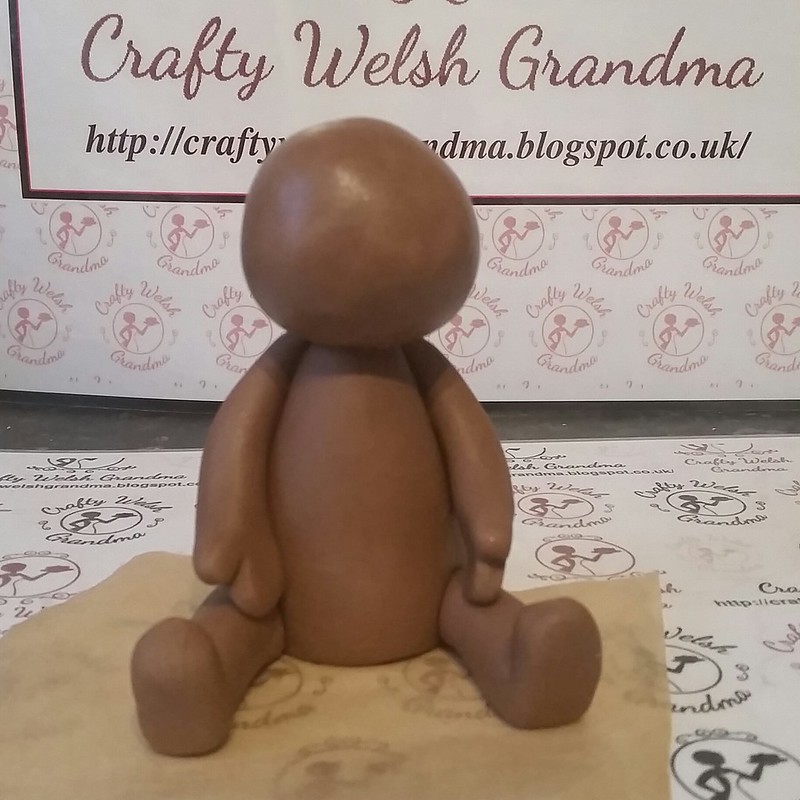
The Body:
The Body:

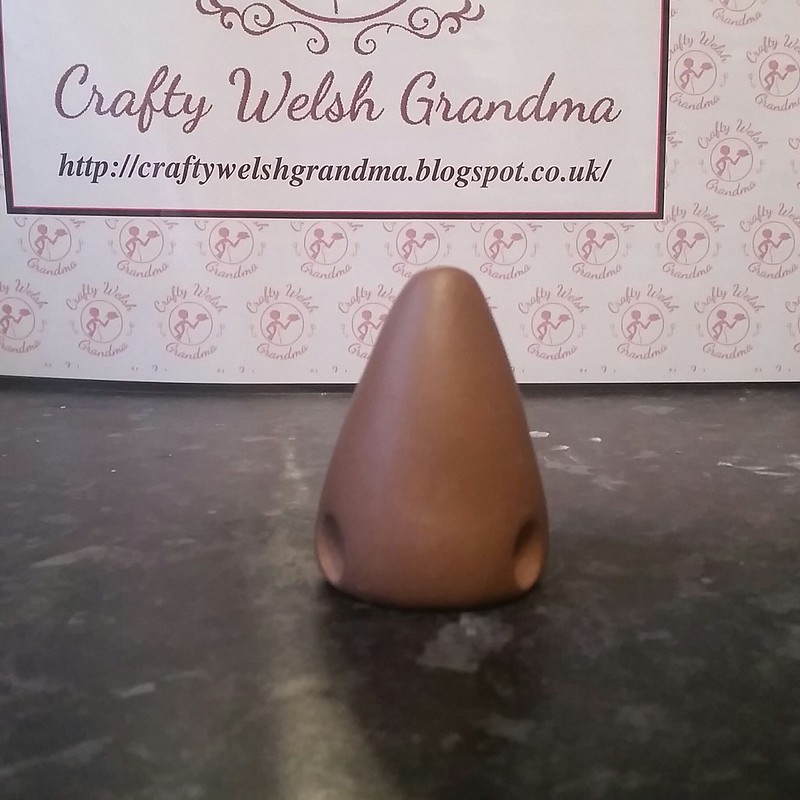
- Roll a ball so there are no creases or blemishes in it. My 'body ball' was about 2 to 2.5 inches across. It is the size on this ball that will determine the size of the rest of your gingerbread person. If you want it smaller or bigger, then adjust the 'body ball' accordingly
- Roll this ball into a cone shape
- Once you are happy with the shape and size, pick the best side for the front.
- Using your ball tool, press into the bottom either side of the centre for the legs to sit into.
- Push either about 1/2 of a cocktail stick or a length of dried spaghetti into the centre of these impressions.
- Before you move on, push a length of spaghetti down through the centre of the body, from the 'neck' to the bottom
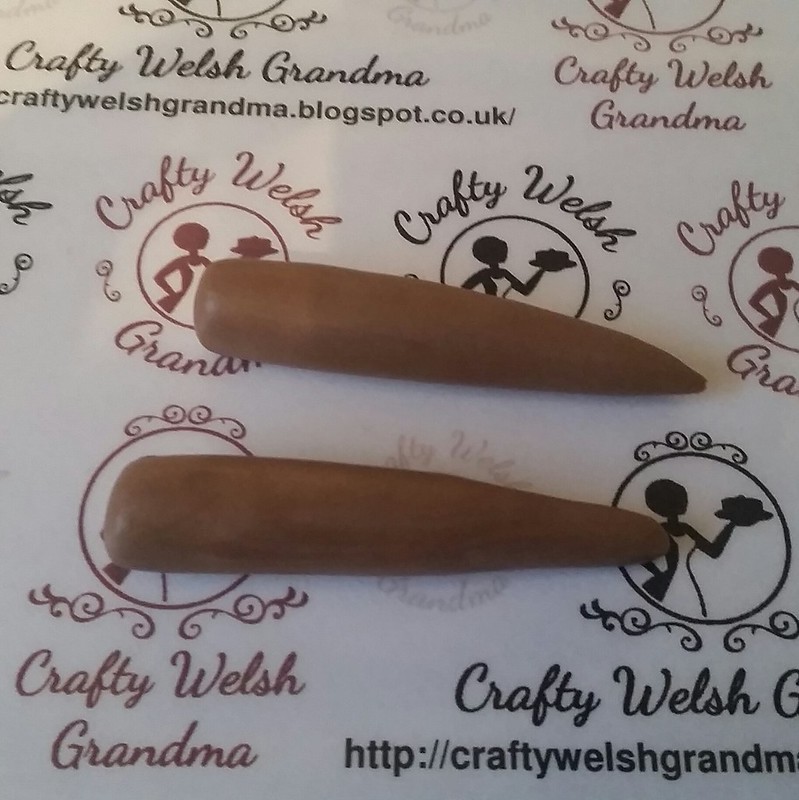
The Legs:
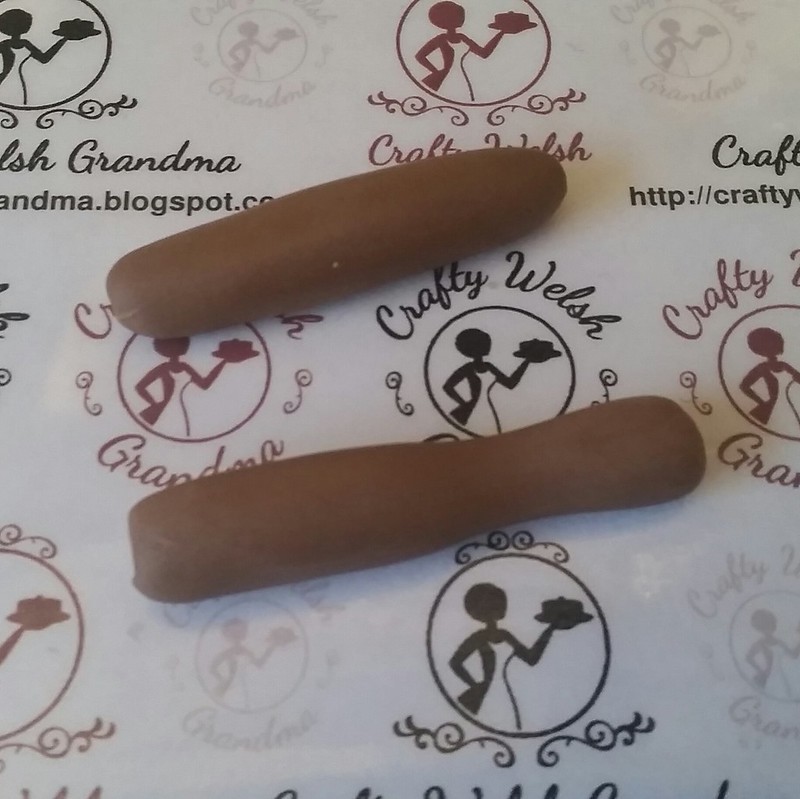
- Roll two sausages, mine was about 2 to 2.5 inches long and about the thickness of my little finger
- At about 1/3 from the end:
- Take your finger and roll, only where your finger touches the fondant, so this little but will form an 'ankle'
- Tap the 'foot', not to flatten it but to make a flattened sole
- Pick up the foot and, with your finger, push it up at a right angle to the rest of the leg. If it won't stay, keep trying. It will happen
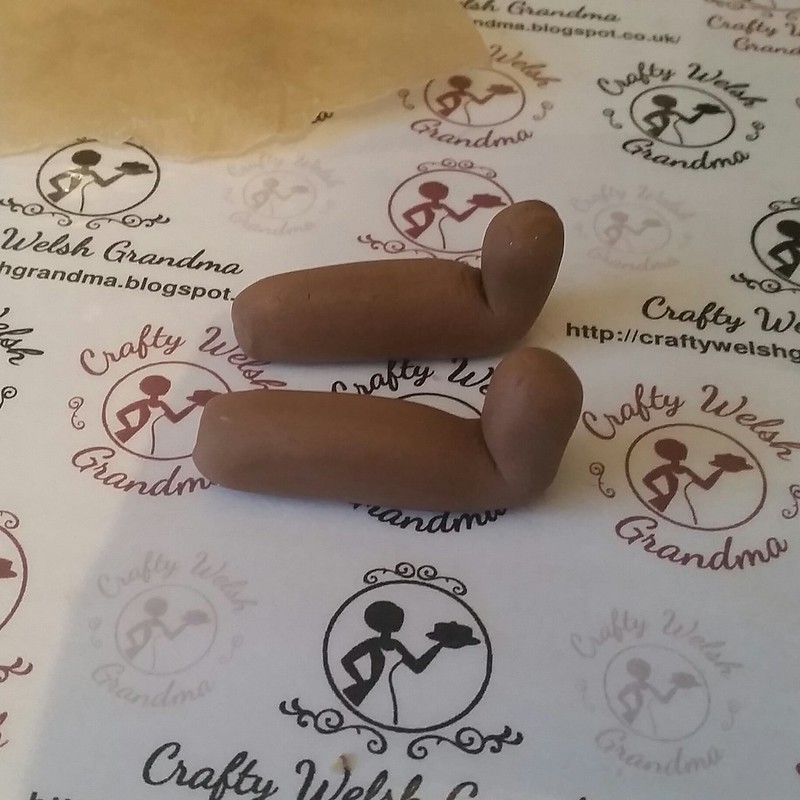
Add legs to body:
Before you attach the legs to the body, check for size. If they are too big, trim a little off at the top and gently reshape.
- If you are happy with the length of the legs:
- Add a small amount of glue / water to the socket and spaghetti
- Gently push the leg on
- Do this for the second leg
The Arms:
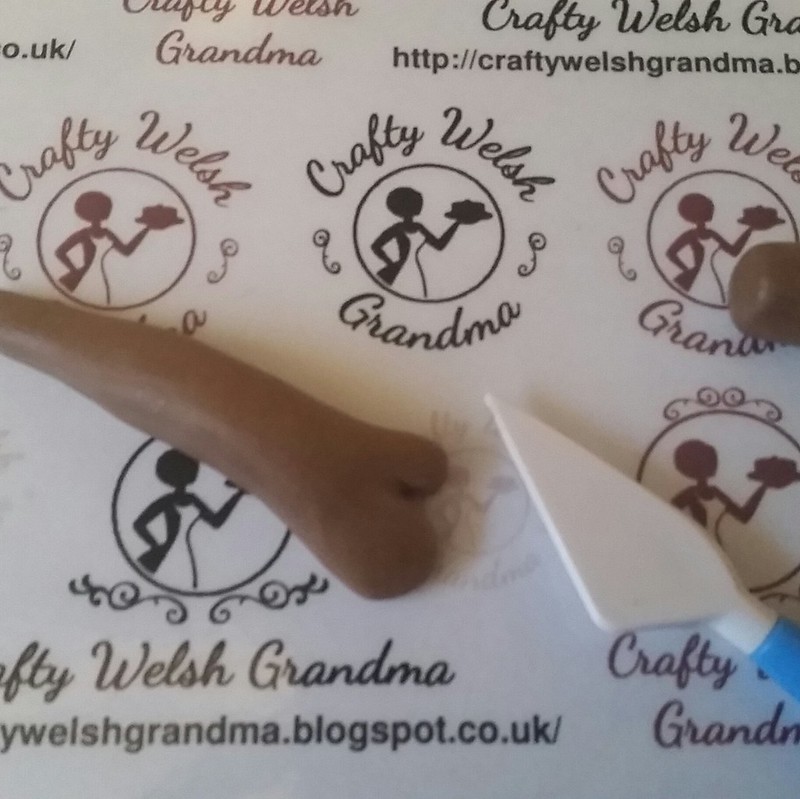
- Roll to lengths of fondant into a long cone, thinner but about the same length as the legs.
- Now tap the fat end to flatten and widen for the hands
- Take your blade tool and, on opposing sides on each hand, make a small cut for a thumb
- Smooth out the shape edges of the cut
- Model one side, between the thumb and the rest of the hand, a little bigger on one hand if you plan on adding the optional candy cane
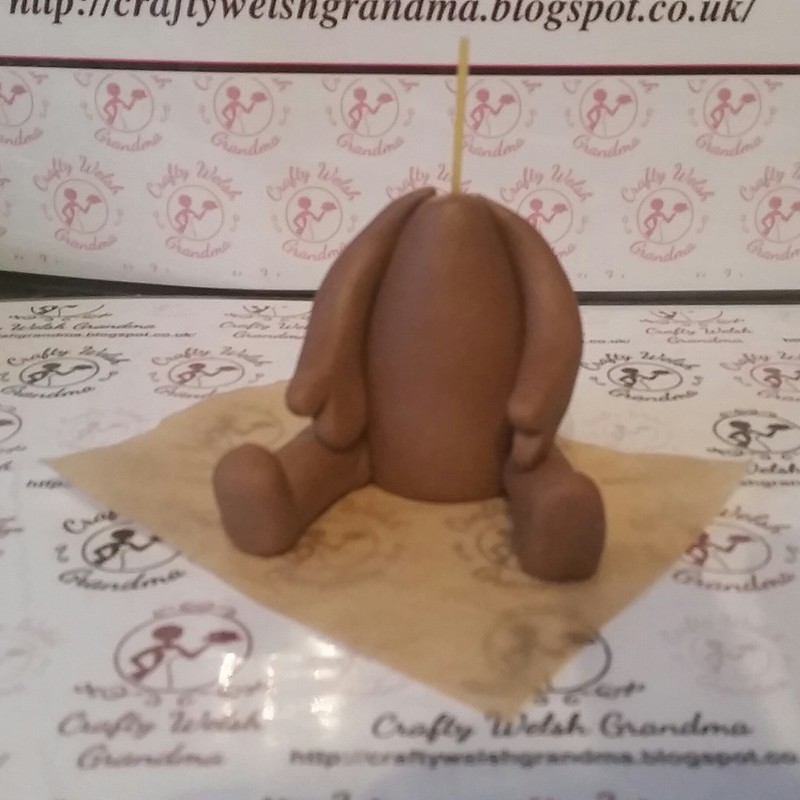
Ensuring that you have the thumbs on the correct side:
- Fix each arm to the body so that the hands rest on the legs
- If there is too much fondant left at the top, cut it off so it's level with the neck

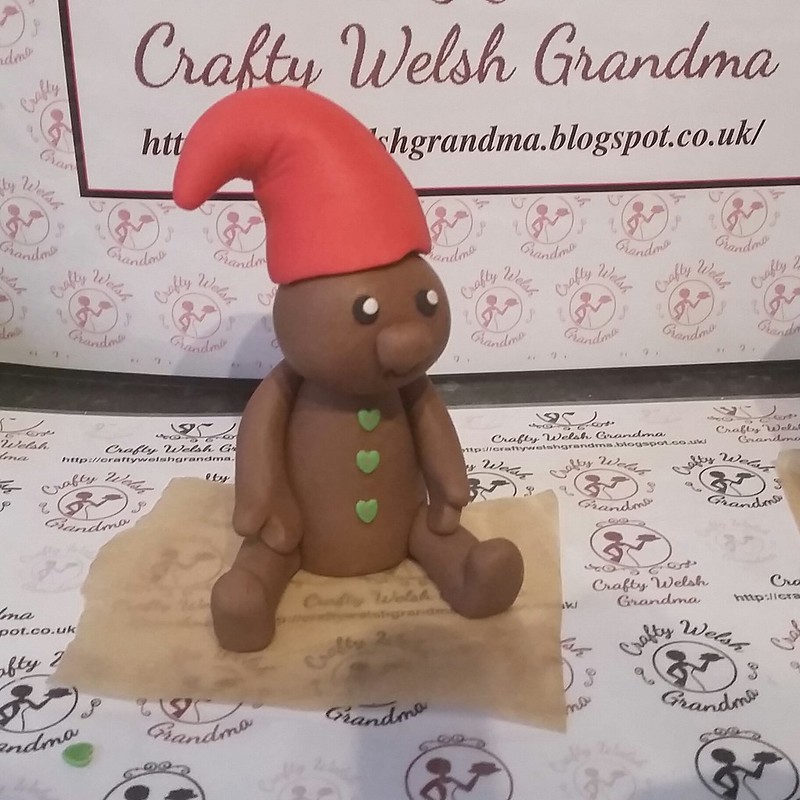
The Head:
- Roll a ball of fondant, in proportion to the body
- Add glue to the neck and shoulders
- Ensuring that the head it central before fixing ...
- Gently twist the head onto the stick down to the shoulders

I forgot to take pictures when putting facial features on, but do this before you put the hat on!
Nose:
- Make a small mark where you want the nose to be.
- You might find it easier to bring your project up to eye level to get this right
- Roll a small ball of fondant
- Reshape into a capsule shape and
- Fix, with glue, where you made your mark
Mouth:
- I used a scallop tool make an indent under the nose to make a smiley mouth.
- I like placing mine on the sides, but you can place yours in the middle directly under the nose if you wish
Eyes:
You can do this by either rolling two small black balls of fondant or, roll out some black fondant, cut two small circles, this is the method I used, whichever way you chose:
- Make two small black circles / balls
- Fix to the face above and to the side of the nose
- Roll two very small white balls and fix to the eyes for highlights If you a white edible paint or an edible white pen, you can use that to make highlights if you prefer
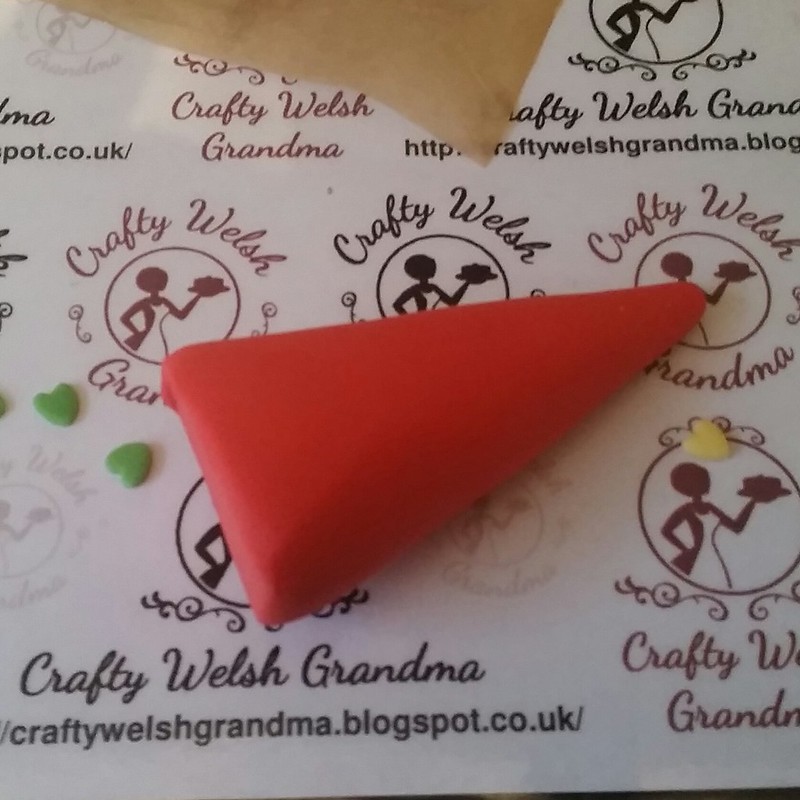
- Roll a ball of red fondant
- Now shape this into a cone
- Check against head to ensure it's in proportion
- Trim the thick end so that it's flat
- Hold the hat gently in your hand and press a small rolling pin into the end to make an impression so that it sits on the head
- Keep checking that it fits and is in proportion
- Thin out the rim out of the hat, using your thumb and finger, so it's not bulky when fixed on.
- Bend the top of the hat to one side, see picture
- Add glue to the indent at the bottom of the hat and ...
- Fix to head Use your blade tool to add 'creases' to the bend of the hat if you prefer, but it does look good
Buttons:
I used small heart shaped cutters, but you can roll small balls and either shape them into hearts or leave as flattened balls.
- Cut three, or more - just in case
- Allow to dry a little
- Using three of your hearts shapes / ball shapes, add them as buttons up the front
- It's easier to start at the middle button first
The Scarf

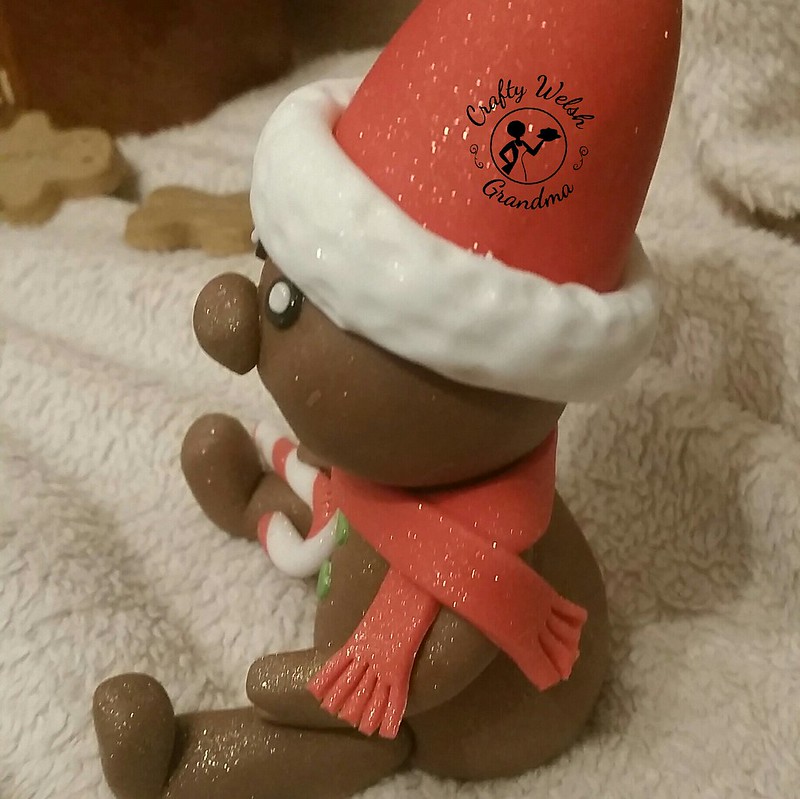
- Roll out, thinly, a length of red fondant
- Cut so it's about 1cm wide
- Measure it against your gingerbread person so that it crosses over and looks like its wrapped
- Cut to length
- Frill both ends
- Add glue to the back
- Place and firmly fix one side to the shoulder so it hangs down the front side of the arm
- Now, rotating your gingerbread person, wrap this scarf around
- Fix firmly over the shoulder, crossing the portion that is draped over the front

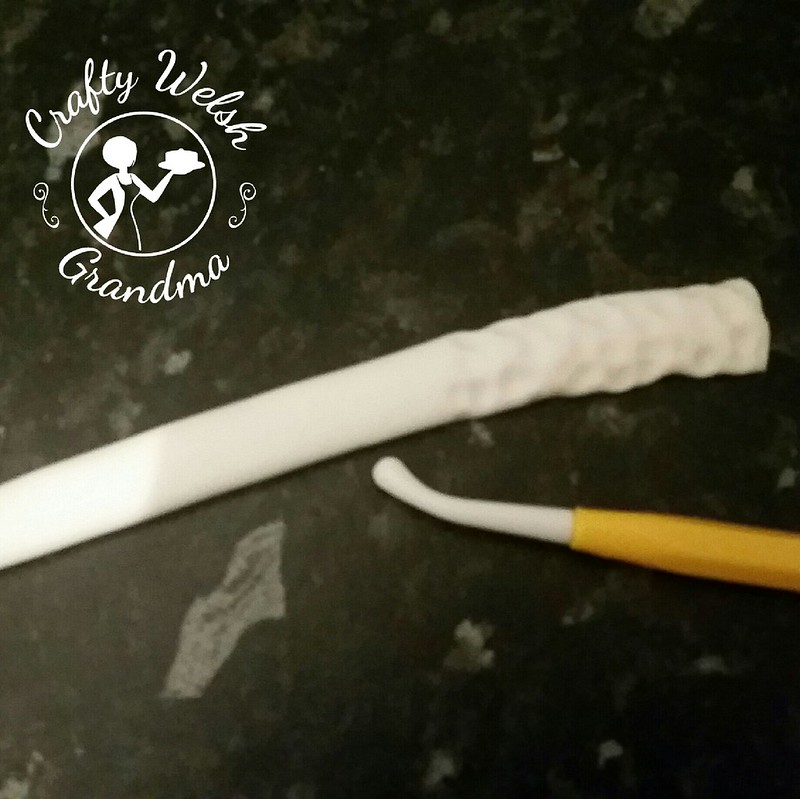
Fluffy white trim:
- Roll a length of white fondant into a sausage shape.
- Check size / length against the hat / head
- Trim where required.
- Flatten this with the portion of your hand at he base of the thumb
- This will adjust the size of your piece, so measure again and trim is necessary
- Using your medium sized ball tool (I needed to use a bone tool for mine) make impressions over the top and long sides of the piece, leave trimmed ends straight
- Roll a ball of white fondant to the size your prefer.
- I wanted an oversized fluffy ball for mine.
- Using the small ball tool, make impressions all over.
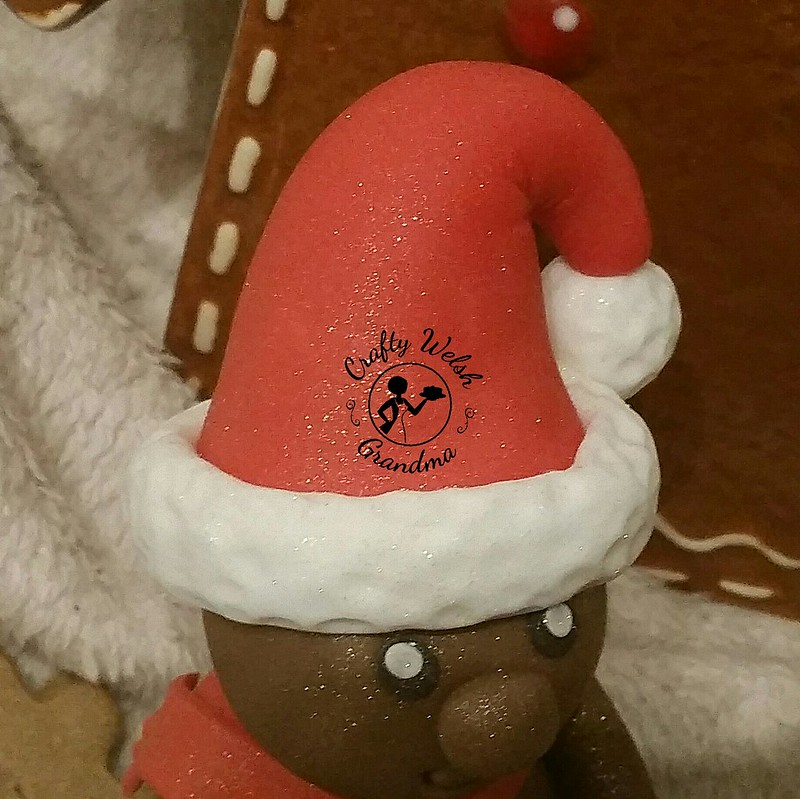
- Add glue to the back / flat side of the trim and ...
- Fix to the hat so it covers the very bottom of the hat and rests just above the eyes.
- Secure all the way around by gently pressing using your finger.
- Ensure the fake fur / impressions are on the top and bottom of the trim
- If not, add some more impressions with the ball toll whist trim is in place
- Dip one end of a piece of dried spaghetti into your glue insert this into the pointy end of the hat to that you can still see a length of it
- Add some glue to the end showing and gently push the pompom onto this If you need more indents / fluffiness, gently add some now


No comments:
Post a Comment